Robotics Society of Southern California
Building Ebot
Note: (almost) All pictures on this site are thumbnails. Double click on picture to download a high resolution large picture. Warning: often exceeds 200KB.
"Ebot" is a project of the Robotics Society of Southern California. The objective is to provide a set of instructions to build a basic amateur robot. The instructions are intended to be detailed enough to allow even an inexperienced person to succeed. The goal of the project is to provide a fast route for our members to build an operating robot.
The goal is to provide a discussion of the design decisions that go into designing a robot like Ebot and to provide a specific design that the members can build to; as well as enough information that the members can modify the design if they wish.
The project will consist of a series of meetings just before the monthly meeting of the RSSC. This meeting will generally review progress of the builders since the last meeting, discuss the next stage of the project, and provide builders with any necessary help or advice. Click here for a project outline.
The mail list at http://groups.yahoo.com/group/sdrs-list (San Diego Robotics Society, we share this list with them) will be used as a forum for discussion and question/answers during the month between meetings.
The project will proceed in a logical manner to get the minimum hardware constructed so that you can begin programming the Ebot. After programming the initial tasks, various options will be presented to add more capabilities to your Ebot.
Getting Started:
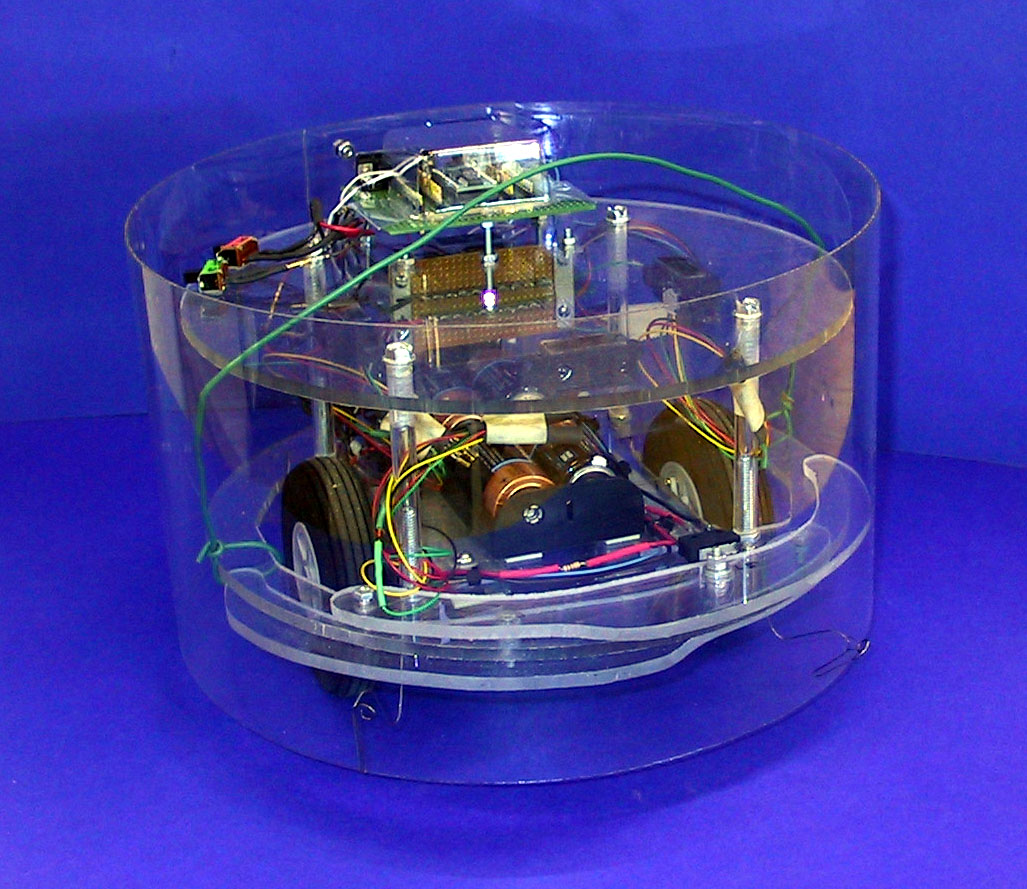
Platform base: This is the plan for a basic round "platform", or chassis, on which all the other components can be mounted.
Servo hack: This section explains how to modify standard radio control servos to make them rotate continuously, and hence be suitable for drive motors.
Wheels: Tells how to attach model aircraft wheels to the modified servos above.
Servo mounting: Gives various options on how to attach your completed motor/wheel assemblies to the platform base.
Casters: How to add skids or wheels to keep your two wheeled Ebot balanced.
Note: At this point you have installed all the parts necessary to drive your Ebot around. Both in straight lines (more or less) and turns. Next we'll add a microcontroller and a power supply, and it will be ready to program and run.
Ready to run:
Microcontroller Selection of the microcontroller that you will use on your Ebot is done next. One reason to do this now is that the particular controller you choose may affect the requirements for the power supply to be designed next.
Power Supply A simple power supply to run the drive motors and the processor.
Assembly Techniques to put the electrical parts together
Note: You now have all the HARDWARE for a basic robot. You just have to program it to do something useful.
Programming:
Note: This section will help you to get your Ebot running under its own autonomous control. Most examples will be for the Basic Stamp 2 microcontroller as that is what most of our club members are doing. There will be some examples of the Motorola 68HC912B32 since that is what I'M using. You may find it interesting to compare the two programming methods as they will be quite different.
Initial objective: We established a simple task for the robot to accomplish that would require only the ability to go straight forward for a specified distance, pivot 180 degrees and return. This is designated as "Contest 1" when you follow the link.
Programming Contest 1:
Note: Congratulations! You have now BUILT an operating autonomous robot. Whle it is entirely possible that you are not very happy with its performance in running Contest 1 (after all, the poor Ebot is asked to do a job similar to you being asked to close your eyes, walk 10 feet forward, turn around 180 degrees and walk 10 feet back)., we will now start on a series of improvements which will make your Ebot much more capable and accurate.
Adding Encoders:
This section , encoders,
will attempt to improve the
accuracy of your Ebot in running Contest 1 and any future navigational
tasks. An encoder is a device which measures how far each of the two drive
wheels has turned. Your microcontroller will then change the pulse widths
to the two motors to make them always have traveled the same distance.
This will cause it to go in a pretty straight line. Similarly, by
measuring how far each wheel travels when doing the 180 degree pivot, the Ebot
can aim back towards its starting point more accurately. After adding
encoders, Contest 1 should be pretty easy.
Second test/contest:
A more challenging navigational task for your Ebot. See Contest 2.
Adding distance sensors:
Distance sensors permit your ebot to navigate with respect to other objects. A common implementation is for your robot to navigate along a wall and turn when another wall is reached. Wall following is another approach to doing the second test/contest noted above.
PROGRAMMING: A quick link to a list of all software available on this site.
CONTESTS: A link to the tests/contests used to evaluate your ebots.