PLATFORM
This page will cover the construction of the basic platform for the robot. This will include selecting the material from which to build the platform, cutting it into the desired shape with cutouts for the wheels, and installing castor(s) to keep the robot upright.
The basic size and shape of Ebot is a 9 inch diameter circle. It is small because a small robot is less expensive to build. This is a good feature for a first educational bot. The nine inch size fits within the size criteria of many contests. The round shape has advantages when you have it navigating around on its own. If the robot gets trapped by some obstacles, it can rotate on its center and exit the way it came in. A robot with a rectangular or other non-round shape may have to make a series of back and forth motions to get out of a trap. This can be much more difficult in software.
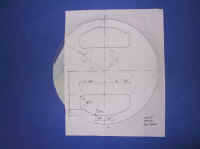
The plan for the platform is here This plan can be transferred to your material
to provide a template for cutting it out. One option is to glue a
copy of the plan directly to the material and then cut around the plan.
Another is to do some careful drafting and draw your own copy of the plan on the
material. The first option is usually the easiest. (if you have a full
size copy of the plan).
The plan provided by Don Fears is slightly oversize (probably due to repeated copying). There is no harm in using it at the slight oversize; or you can reduce it slightly to get it back to 9 inches.
The first picture shows a plastic (Lexan) sheet with the plan glued to it using Elmer's white glue. You may notice that the plastic has already been cut to the 9 inch diameter. (I started this platform a year ago.)
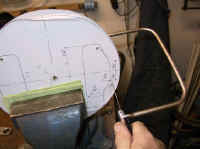
The plastic can be cut using a variety of methods. A saber saw or jig saw may be used. If so, you should apply some masking tape or other protection around the cut lines to keep the saw from scratching the material. A coping saw is the cheapest method. A scroll saw is a nice but more expensive option.
The outer circular cut may be made just by clamping the
plastic down and cutting from the edge. The two interior wheel cutout
holes must be started by drilling a hole through each cutout. Assembling
your coping saw or scroll saw with the blade through the drill hole, then
cutting from there.
Making your platform pretty, takes a little more
work. First, when cutting the part, try to stay as close to the line
as possible without going over it. This will greatly reduce the amount of
work to smooth the cuts out.
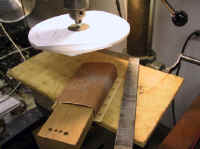
The nearby picture shows one method of smoothing the outside edge of the platform if you have a drill press (or even a hand drill mounted in a vise). Drill a hole EXACTLY in the center of the round cutout. then clamp the disc between two washers with a bolt and nuts. The mount the end of the bolt into your drill and turn it on (at a low speed). You now have a lathe. Use files and/or a sanding block to smooth the edge. Or, you can just use sandpaper to smooth it by hand.
Smoothing the wheel cutouts is more difficult. Use flat files to smooth the straight edges. Move the file back and forth from one curved end to the other to get the straightest edge. Use a rounded file of appropriate radius to do the curved corners. A final hand sanding can probably give you a pretty good appearance. This can take a lot of time and effort to make it look good. Matching up the straight sides of the cutouts to the smooth curves at the corner can be challenging. On the bright side, it doesn't have to be beautiful to work. So, finish it to your own standards.
If you are using a solid plastic like Lexan , you can finish the cut surfaces to be clear and glossy by a process called "burnishing". Carefully apply a propane torch flame to the cut surfaces. Done properly, the surface will melt slightly and become glossy. Apply too much heat, and you may distort the plastic or burn it. Practicing on some scrap plastic would be a good idea. You will quickly find that burnishing is not a replacement for good filing and or sanding. If the surface has scratches, they will just become glossy scratches. Actually, a sanded surface hides defects better than burnishing.
Sintra plastic is slightly foamed in the interior and will not burnish.
Good Luck!